
Our caravan was in need of a 12V upgrade, so we set about installing the popular Redarc Manager30 Battery Management System.
With more than a decade of caravan travel under our belts that’s included a couple of laps of the map, it’s been a perfect and memorable way to see the country. And travelling with our 11-year-old caravan, which has has an ensuite, diesel heating and even a 12V air-conditioner, it has everything we’ve needed, plus more. But it hasn’t all been roses – our ability to free-camp unplugged for extended periods is one area where our caravan has lacked. We really never knew how well our batteries were charged, or how much capacity they had left.
You could say the caravan’s electrical system was current when we purchased it more than a decade ago, but it was pretty basic. The electrical system largely focused on being a 12V power supply with a charger, and it used additional components from multiple brands and devices. It was a bit of a dog’s breakfast by today’s standards and wasn’t a true battery management system. Although it worked, today’s technology is vastly improved, and there’s far better solutions available in the world of battery management. It was time for an upgrade.
THE REDARC PROJECT
Having made the decision to go through with the electrical upgrade, we took an ‘out with the old, in with the new’ approach. The Redarc Manager30s Battery Management System (BMS) was something we were already familiar with, so we chose to go with it again. We like the fact it offers many solutions for managing batteries all wrapped up in a single case.
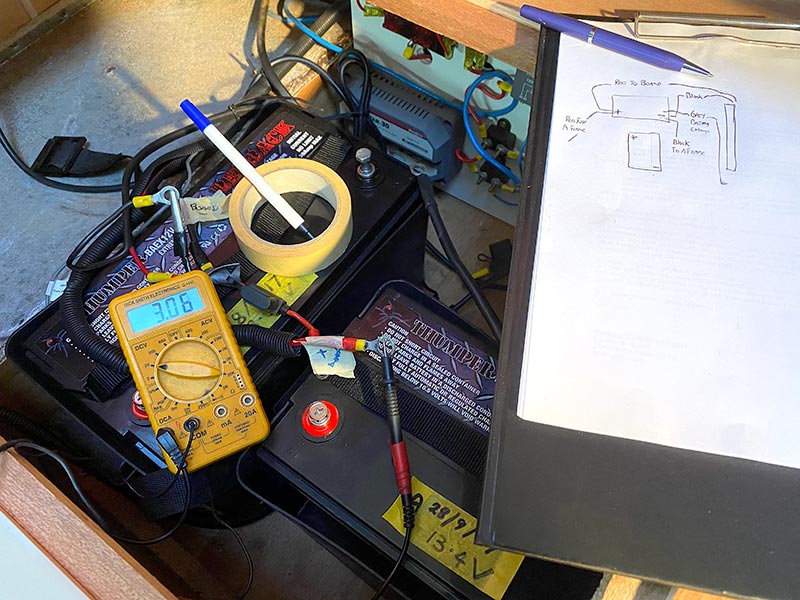
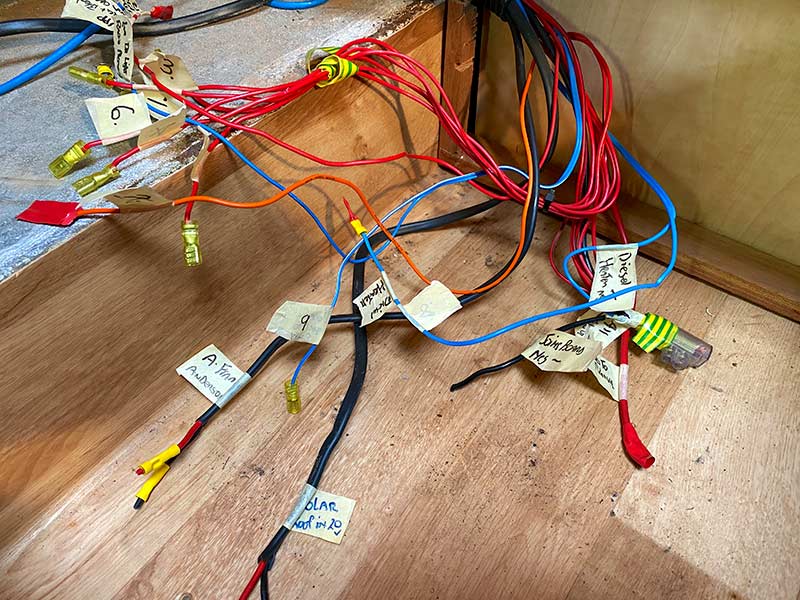
Before removing the old gear, we needed to understand the existing circuit. After carefully removing the old electrical board, we uncovered wires galore that needed labelling. It was a bit of a job to trace, test and label every wire and connection, but that time was well spent and really helped us understand how we’d go about designing the new electrical 12V distribution board.
With the old board out and a circuit diagram we’d drawn in hand, the new design layout started. We found the Redarc Manager30’s instructions and diagrams were easy to follow and used these as a guide. They explained where wires needed to go, which wires needed to be used, and the wiring size required for the job. Having this information at our fingertips made the job simpler.
The areas we were keen to upgrade included circuit protection and fault-finding capability, along with improving current flow and reducing voltage drop. To address these, existing load cables were replaced with larger diameter cabling, and some professionally crimped ring terminals were incorporated to ensure sound electrical connections.
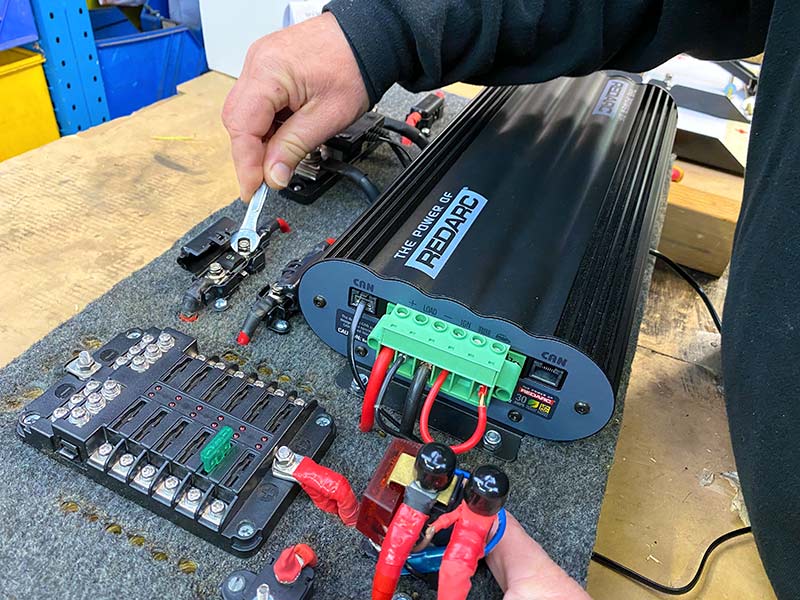
To add further circuit protection, we introduced some midi fuses to suit our application. And while we were at it, we replaced the six-outlet fuse board with a 12-outlet type to reduce the doubling up of circuits.
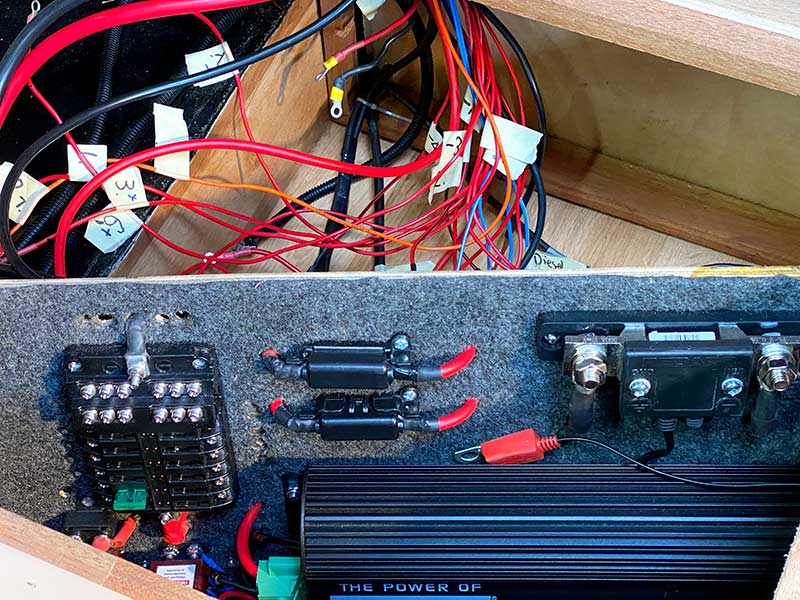
Everything was securely mounted onto the new board, and wires were connected and secured to prevent them from working loose before the new board was installed in the caravan. With all the wiring now fitted with ring terminals, numbered and labelled, it was simply a case of feeding the wires into place, following the numbers and screwing them in. To complete the upgrade, we added a pure sine wave 350W inverter to charge small electronic devices, such as computers and some batteries that required a 240V power supply to charge.
With the BMS coming equipped with a detailed diagnostic display, we found the perfect spot to mount it in our caravan so it would be easy to read. The display incorporates multiple screens to show important electrical information like state of charge, solar input, the loads being used, and much more.
Before testing the system, we customised the BMS and added information about the type and size of our batteries, and utilised the low voltage cut-off feature. At the same time, we programmed in some early warning alarms as well. All circuits were then tested and the amount of draw for each one was checked on the BMS.
HOW IT WENT
It was easy to see the number of amps being produced and going back into recharging the batteries when a bit of sun hit the caravan’s solar panels. This information isn’t something we could see with our previous system.
The DC-DC function within the new Redarc BMS also displayed the amps being produced by our tow vehicle to charge the caravan’s batteries when connected, and it even gave us an indication as to how long it would take before reaching 100 per cent state of charge. Now we’re talking!
WHAT WE THINK
This was a satisfying DIY project. Having some knowledge and electrical experience definitely helped when tackling the job. While it’s still early days, we feel it’s been a very worthwhile exercise, given the added benefits the BMS provides compared to our old system.
We can now visually diagnose things quickly and make adjustments as needed. No longer do we have to guess whether we’ll have enough power to stay one more day, and that alone makes the upgrade well worth it. On top of that, we’ve now got a system that’s going to ensure our batteries are looked after so we can get the maximum life out of them. So for us, it’s a win all around.
Note: do not attempt a 12V project such as this unless you are absolutely confident. If you are in any doubt, have a specialist complete this upgrade for you. While it is permissible to complete 12V projects without electrical qualifications, work on 240V systems must be carried out by an electrician.


