
If you’re as passionate as we are about seeing the country, you’ll inevitably find yourself travelling on remote gravel roads. And it’s here where the saying “the more remote you go, the better prepared you need to be” rings loud and true. Should you find yourself in the middle of nowhere with things having gone wrong, the likelihood of getting immediate assistance is low.
Phone reception could be non-existent as well, and that could mean the cost of getting someone to come and help will not be cheap. In fact, you could be looking at upwards of a few thousand dollars. While fully servicing your setup before each trip will no doubt help prevent breakdowns and failures, it is nearly impossible to foresee every conceivable breakdown. That leads us to the question of what spare parts you should carry for your setup.
We’ve found that by equipping toolboxes with a few power tools, some hand tools, plus a few bits and pieces from the hardware store, there’s a fair chance we can make a bush-style repair. We’re talking the type of repair that’s good enough to keep you going so you’re not up for big bucks to get rescued. The aim here is to get yourself going to where a permanent fix can be made.
Here’s an example of a bush fix using some basic things we had with us when a water tank strap broke on our camper trailer on the Kimberley’s infamous Gibb River Road. Surprisingly, this type of failure isn’t as uncommon as you might think. For us, our circumstances could have been quite different if we were unable to get ourselves out of this pickle.
DISASTER STRIKES
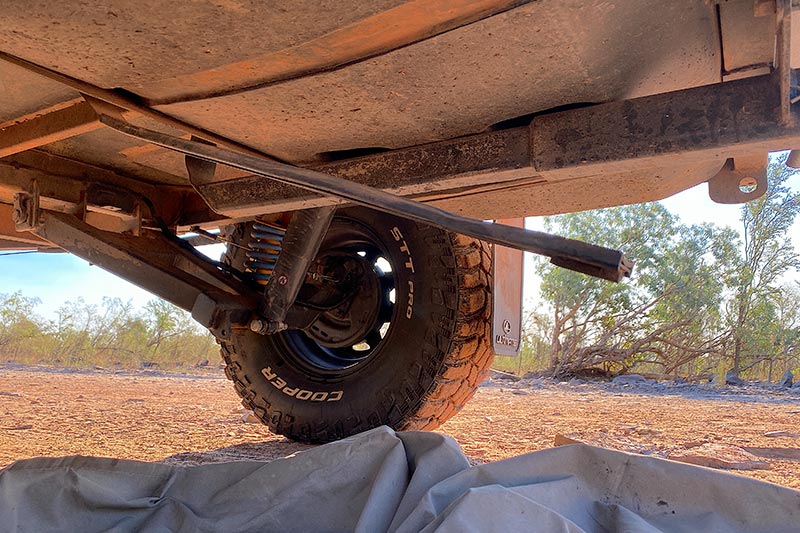
While daily maintenance checks of our vehicle and trailer are an important routine for us, it was during a water crossing where we noticed one of our camper trailer’s water tank straps was swinging in the breeze.
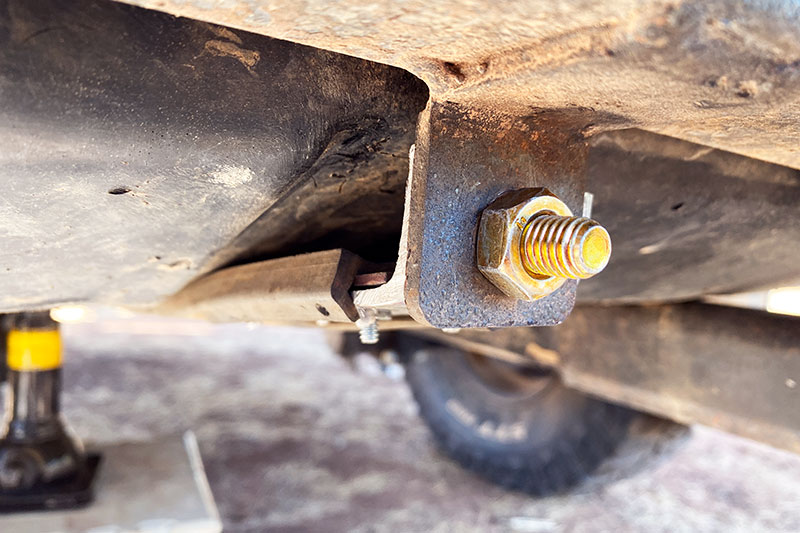
Taking a closer look, we saw the welded bracket bolting attachment had fatigued and sheared off. We knew there was no way of reattaching it without first removing the broken welded bolt and putting a new one in its spot. We were lucky that the second bracket was still in place.
As the camper also had a rear bumper bar hitch fitted, we knew the 130L plastic water tank wasn’t likely to fall out. But we also knew that if we left things unattended, we were taking a risk that the tank might rub on the hitch bracket and put a hole in it. This was something we definitely wanted to avoid.
QUICK FIX OF THE WATER TANK
We saw the problem as two-fold. We knew we needed to improve how the tank was being held in place, and that we had to get that broken tank strap back into position. After a quick look through our toolkit, it was a toss-up between using a ratchet strap or some eight-gauge fencing wire.
We weren’t keen on letting some water in order to to lower the tank to get the wire in place, so the ratchet strap was our pick. As it turned out, it was a relatively easy job to feed the strap under the water tank and tank strap before securing it to some fixed steel recovery brackets.
This fix alone may have been good enough if we simply turned around and headed back the 300km of corrugated road to the nearest town. But we decided to push on. The water tank was still full, and we had quite a long trip ahead of us.
Yes, we knew a more substantial repair was warranted, but we were confident in our ability to make the repair given everything we were carrying in our toolbox. It was time to find a camp and tackle the job first thing the next morning.
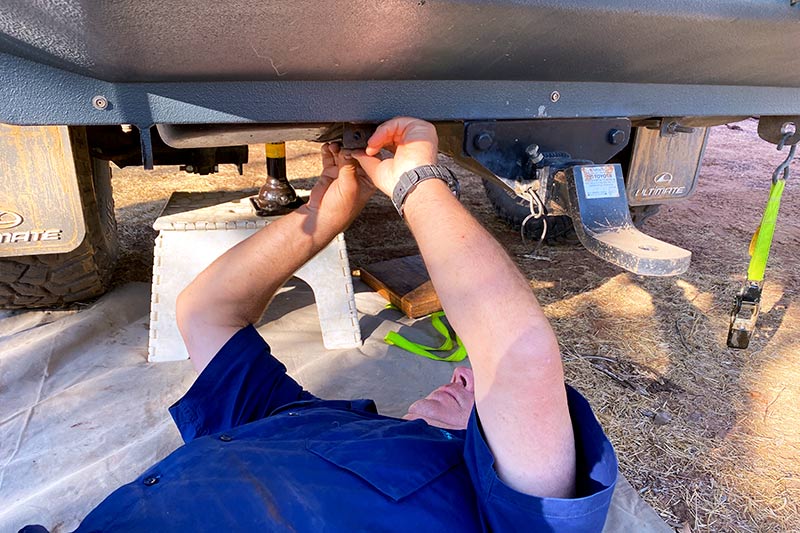
A BUSH WORKSHOP
With a canvas crawl mat in place on the ground, it was out with the toolbox, some battery-operated power tools, and a few steel and aluminium offcuts. Our Kimberley workshop was set-up and ready for action.
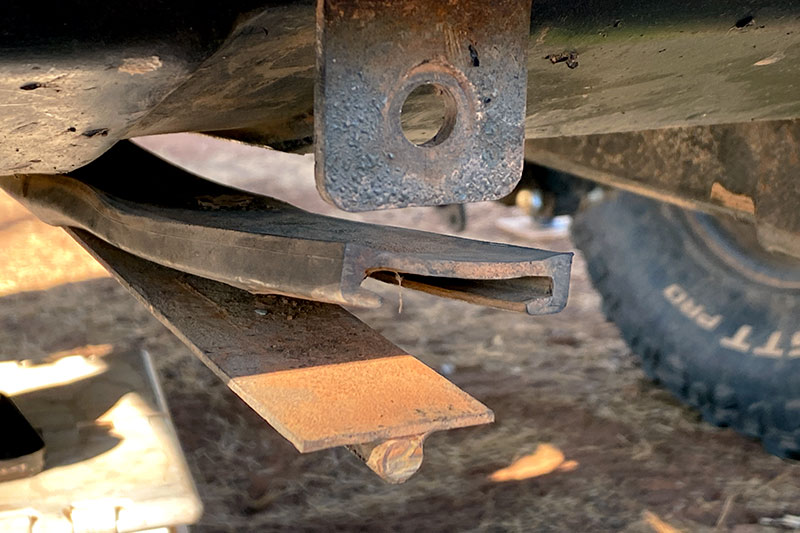
We didn’t have our welding leads with us on this trip, so we opted to make a bracket that would replicate the attaching threaded bolt. We thought this type of fix would keep the tank located in its original position, plus give us the best chance to continue our adventure as planned.
The next job was to remove the ratchet strap and check the tank was in its correct position. We did this by using a small stool and a bottle jack along with some packing wood. Once everything was in place and able to take the weight of the full tank, we could look at getting the broken strap into position. As it turned out, the broken strap needed to be reshaped slightly. With a few blows with the hammer, it was right as rain.
FABRICATION TIME
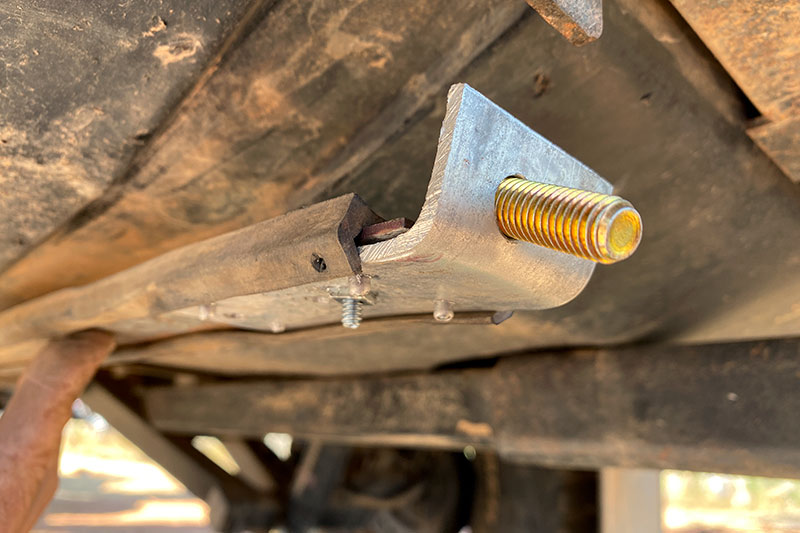
With the broken water tank strap reshaped, it was time to get fabricating. A bracket needed to be attached to the broken tank strap, which then allowed it to be bolted in its rightful position.
We thought a small off-cut of some aluminium plate we were carrying would do the job nicely. It was the type of thing that could easily be cut to size and shaped using a hacksaw, and we could drill through it for some attaching holes and fold it into shape using vice pliers and a hammer. We got to work with the aid of a large rock as our bench and a small G clamp as a vice.
With the new bracket made, the next step was to attach it to the broken water tank strap. After working out the best location for it, the bracket was held to the strap using the G clamp.
While a small bolt brought the two parts together, some holes were drilled on the tank strap where four small pop rivets were added. These would provide a super strong join for the new bracket to the existing tank strap.
Everything went to plan flawlessly. All that was now left to do was to add a new nut and bolt to the newly formed water tank strap. This allowed the strap to be bolted to the existing original welded camper trailer’s chassis bracket. With the bolt now securely done up, the tank strap had been returned to its original position and the makeshift jack stand could be removed to allow the full weight of the tank to sit correctly on the two water tank straps. Job done.
When we were ready to go, we were confident the repair was adequate and we could get on with our Kimberley adventure as planned. That said, we kept a watchful eye over the repair on a regular basis and found it worked faultlessly. We ended up travelling around 4000km of mixed road conditions before getting home. Now that we’re back, there’s no reason we couldn’t remove our fabricated makeshift bracket and weld a new attachment bolt in place.
TIME TO REFLECT
When our camper trailer goes everywhere we take our vehicle, you could say it gets its fair share of tough washed-out corrugated roads, rocky outcrops, and undulating sand dunes. And it’s probably travelled the Gibb River Road at least half a dozen times or more. So now we’re home, it’s time to reflect. And you could easily be thinking, “Why did the water tank strap break in the first place?”
One thing we didn’t mention earlier… we replaced the camper’s original shockers before this trip. The old ones were completely flogged out, so these were swapped them out for some new shockers. As it turned out, the new ones were a different brand. We now wonder whether the broken water tank strap had worked loose at some stage, allowing the water tank to bounce about a bit on corrugated roads. This may have placed a vibrating load on the bolt. Added to this, we believe the internal valving of the newly fitted shockers created firmer operating conditions.
While this is great for high-speed smooth blacktop driving, we feel it’s too rigid for the rough outback, washed out, corrugated roads that we generally find ourselves travelling on. So we’ve now returned to the camper’s original shockers, which we’ve had reconditioned with new bushing and internal valves replaced as part of a permanent fix. These provide our camper with a softer water as they soak up corrugated roads far better with the way we tow it.
We’ve now also added nyloc lock nuts to the attaching tank straps, and added a check of the tank and the tank straps to our daily maintenance checklist.
SUMMING UP
No one ever plans to have a breakdown. But things like a broken water tank strap can happen. By carrying some tools and having a few simple hardware items on board, there’s a fair chance you’re going to be able to get yourself moving again.
Granted, it might be at a slower pace, but the fact you’re back on the move is a good thing, and that’s the best outcome anyone could wish for.


