

In this, part two of our guide to purchasing a secondhand RV, we want to give you a checklist of what to look for when inspecting an RV with the view to purchasing it. The observations you make at this stage of the purchasing process are critical and this checklist can help you avoid ending up with an expensive nightmare.
ASK QUESTIONS
While you’re doing the inspection, you should be taking the opportunity to ask as many questions as you can. Here are some questions you should ask:
● How many previous owners of the van has there been?
● How often has the van been used and where has it been taken?
● What modifications have been made by the previous owners?
● Has the van suffered any damage and, if so, how was it repaired?
● Has the van been service regularly and does the owner have a recorded service history?

REGISTRATION AND FINANCE CHECKS
Before you commit to purchasing any secondhand vehicles, including RVs, you should check that it is registered, hasn’t been written off and that there are no outstanding financial encumbrances. The roads authorities in each state and territory have their own registration-checking services on their respective websites.
Further, the Australian government runs the Personal Property Securities Register, which contains financial information about vehicles and whether they’ve been stolen or written off. Some of these services may charge a small fee. Alternatively, you can go to www.carhistory.com.au and get all this data collated into a single report for between $25 and $40, depending on the type of vehicle.
|
EXTERNAL INSPECTION |
UNDERNEATH INSPECTION |
|
GENERAL CONDITION OF THE OUTER SKIN: ● All walls should be straight and uniform in colour. Any changes in colour could indicate damage that has been repaired. ● Look for cracks at the corners of the windows, doors and storage cupboards. ● Check all doors open and close freely. ● Look along the lower edges, where the walls meet the floor, for signs of water damage. ● Examine the edges of all windows to ensure the sealant is still in good condition. |
CHECK THE CHASSIS: ● All walls should be straight and uniform in colour. Any changes in colour could indicate damage that has been repaired. ● Look for cracks at the corners of the windows, doors and storage cupboards. ● Check all doors open and close freely. ● Look along the lower edges, where the walls meet the floor, for signs of water damage. ● Examine the edges of all windows to ensure the sealant is still in good condition. |
|
LOOK INSIDE ALL THE EXTERNAL STORAGE COMPARTMENTS: ● Open all external storage cupboards and look closely at all the walls and floor. Look for any discolouration that may indicate water ingress. ● There may be electrical wiring in these spaces so check that it has not been damaged. ● Check all locks operate freely including any locks on water tank caps. |
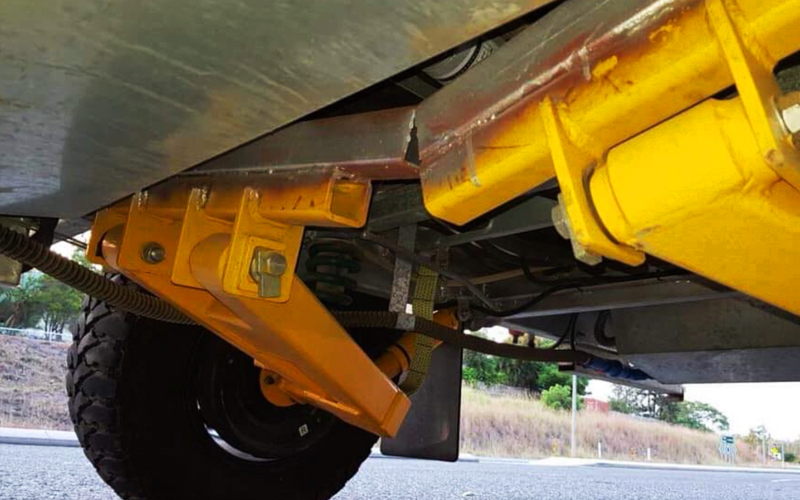
CHECK THE SUSPENSION: ● Compare the appearance of both sides and look for any irregularities that may indicate damage. ● With leafsprings, look closely at the spring packs and check for signs of broken springs. ● Look for any movement in shock absorbers. Also, look for signs of leakage. Minor stone damage is to be expected but any major dents could mean repairs are required. |
|
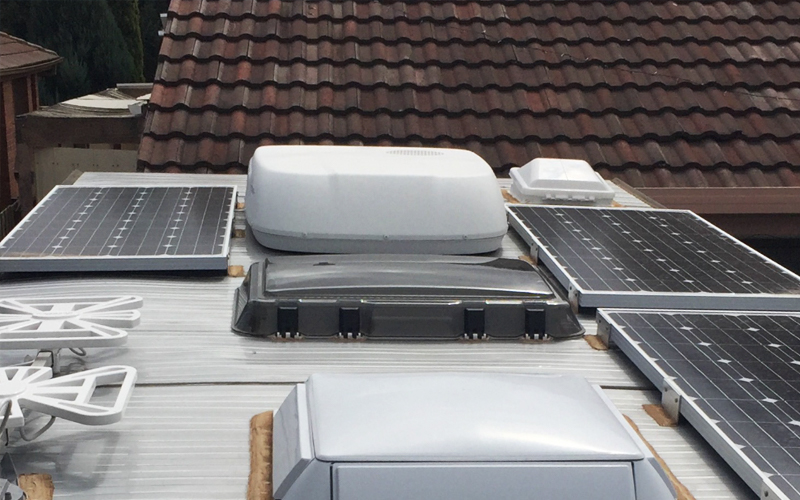
USE A LADDER TO LOOK AT THE ROOF: ● Have a close look at all the seals around the edges of the roof where it meets the walls. ● Check the condition of the sealant around all the hatches and vents. ● Look for excessive warping of the roof skin. Some slight warping is normal, especially in hot weather. ● Remove the hood from the air-conditioner and check the condition of the heat exchanger coils. ● Look for signs of damage to the radiators. Excessive dust build-up on the coils may indicate the air-conditioner is in need of a service. ● Check the condition of the TV antenna. Ensure all wiring is in good condition. |
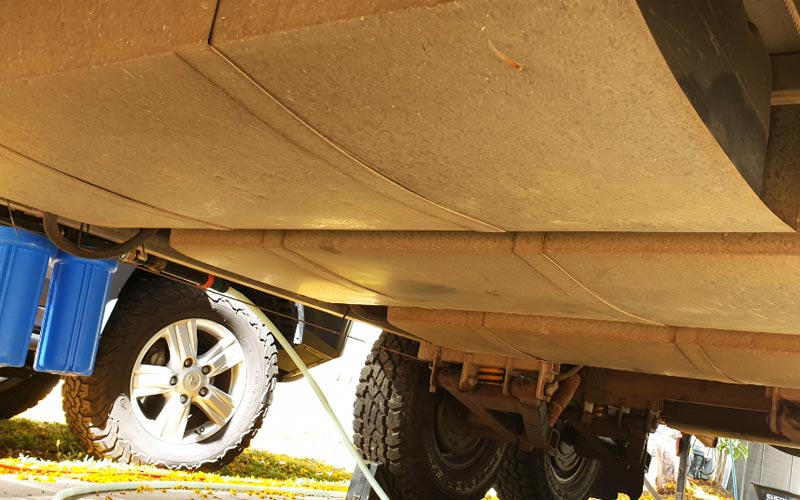
CHECK PLUMBING AND WIRING: ● Wiring should be neatly tucked up out of harm’s way. Look for breakages. ● Inspect gas lines and look for damage such as cracks or dents. ● Inspect the plumbing for signs of damage caused by driving on gravel roads. ● Fill the water tanks and check for signs of leakage. |
|
CHECK ALL ATTACHMENTS: ● Ensure any additional storage boxes, rear bumpers, spare wheels and jerry can holders are all properly secured to the vehicle. ● Extend out the awning and ensure it operates correctly and that the material is in good condition. |
DRAWBAR: ● Check the condition of the hitch. Off-road hitches should move freely at their pivot points. ● Check operation of the jockey wheel. ● Check gas bottles expiry dates. ● Turn on both gas bottles and check the operation of the regulator/selector. |
|
FOR CAMPERS, POPTOPS AND FOLDOUT STYLE CAMPERS, CHECK CANVAS CONDITION: ● Ask the owner to show you how to fully erect the RV, noting the condition of the canvas, any zippers and poles. ● Once you’ve completed the inspection, ask to see how the unit is packed away. ● If the van or motorhome is fitted with a slide-out, have the owner extend and retract it. |
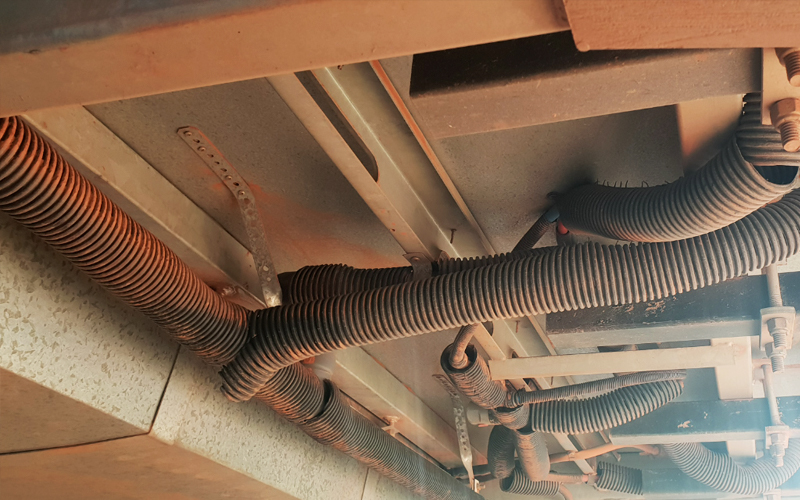 All plumbing should be tucked away out of harm’s way. The owner of this van has added extra protection to all drain pipes All plumbing should be tucked away out of harm’s way. The owner of this van has added extra protection to all drain pipes |
|
INSIDE INSPECTION |
CONNECTING THE VAN |
|
SMELL: ● When you walk inside, take a deep breath. If it smells like damp and mould, there’s a good chance the frame is rotten or there’s a mould infestation. |
CHECKS LIGHTS: ● Turn on headlights and test the operation of the clearance lights (front and sides). ● Test the operation of the taillights. ● Turn on hazard lights and test the operation of the indicators. ● Depress the brake pedal and test the operation of the brake lights.
|
|
WALLS AND CEILING: ● Look closely over the ceiling for signs of water leaks, particularly along the edges and around the lights and vents. Look for any bubbling or discolouration in the paint. ● Gently press the lower walls along the floor and feel for sponginess. This could be another sign of water damage. ● Ensure all window locks are aligned properly and hold the window shut. |
CHECK BRAKES AND TYRES: ● While testing the brake lights, if the van is fitted with electric brakes you should hear a buzzing noise indicating the brakes have engaged. ● Inspect all tyres and look for signs of uneven wear. Make sure you check any spares. |
|
CABINETRY: ● Open and close all cabinet doors. Check for any binding. Ensure all latches lock and hold the doors shut. Look inside for signs of water leaks. |
 Another good spot to look closely for signs of cracking Another good spot to look closely for signs of cracking |
|
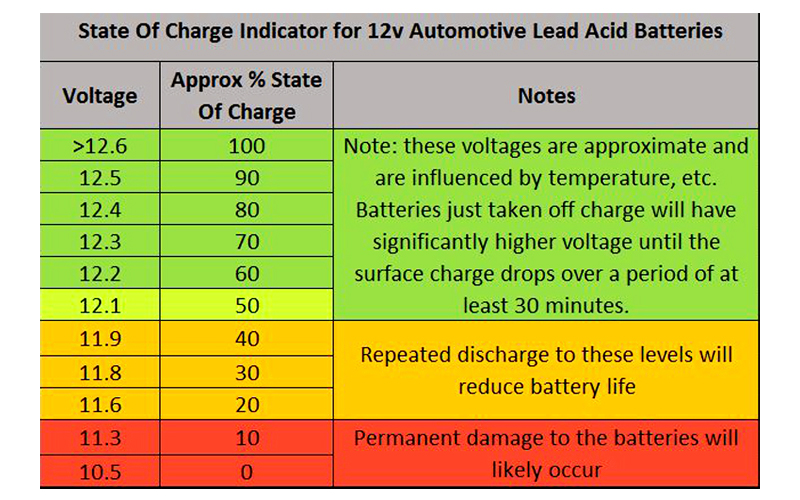
ELECTRICAL (240V AND 12V): ● Check the condition of the battery. Look for swelling in the casing or corrosion. These could indicate the battery needs replacing. ● Check voltage. Refer to chart (page 44) for state of charge indication. ● Check operation of the solar controller if fitted. If the RV is in full sun, the controller should indicate at least 13.7 volts. ● Turn on all 12V lighting. ● Turn on water pump and test flow out of a tap or shower. ● Test condition of breakaway brakes battery if fitted. ● Plug into 240V mains power and check each power outlet with a test load, such as a small lamp. ● Check the safety switch by pressing the test button. |
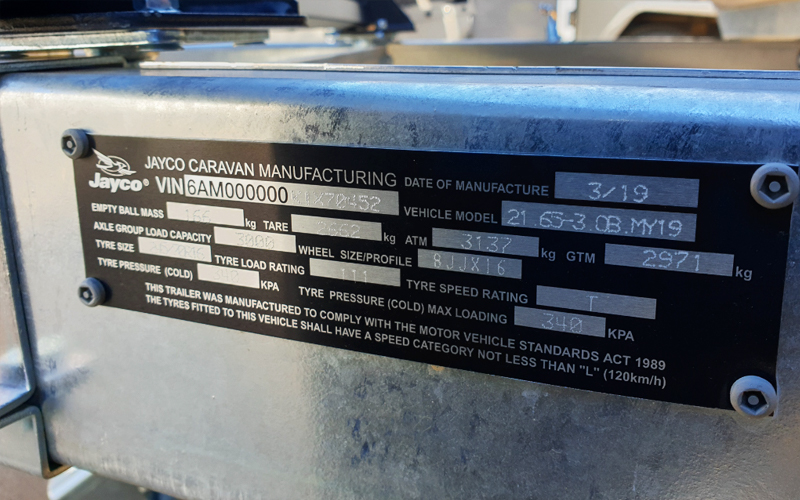 Check the VIN plate and make sure you have sufficient cargo capacity for your needs Check the VIN plate and make sure you have sufficient cargo capacity for your needs |
|
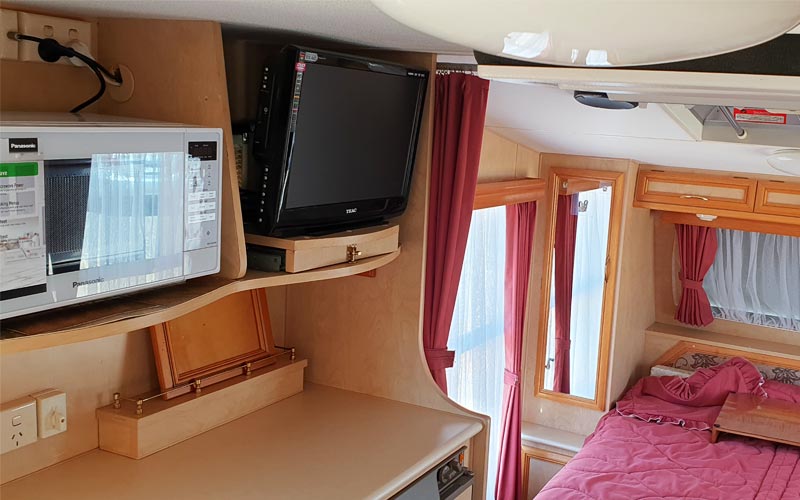
APPLIANCES: ● Test the operation of all the appliances: ● Air-conditioner; ● Cooktop/griller/oven; ● Microwave; ● Hot water system; ● Fans; ● Stereo system including outdoor connections if fitted; ● Television; ● Washing machine; ● Fridge/freezer; ● Satellite TV tuner; ● Wi-fi router if fitted. ● Make sure all appliances are securely fitted, particularly the microwave and washing machine. |
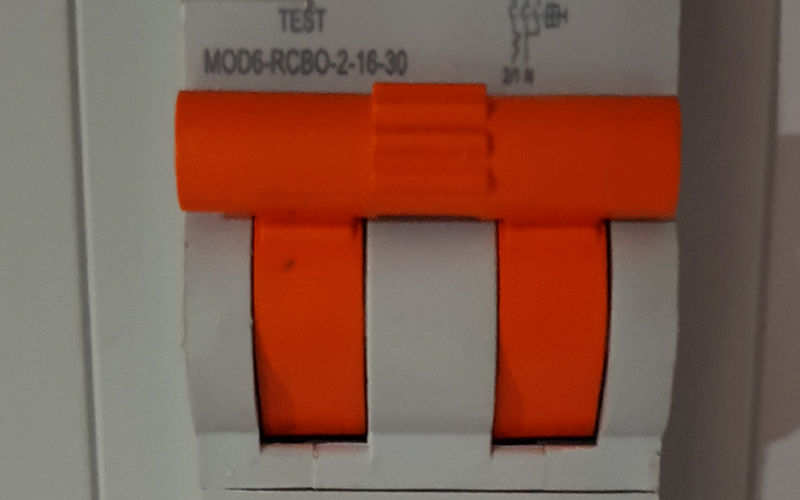 Connect the vehicle to 240V mains and check all power outlets. Also check the safety switch operation Connect the vehicle to 240V mains and check all power outlets. Also check the safety switch operation |
|
MANUALS: ● Ensure you have manuals for each appliance. |
PROFESSIONAL INSPECTION
After reading all this, there will be many prospective buyers who will believe that this is all too much to consider. That’s fair enough too. For those people, there are professional RV inspectors who will do all the work for you.
They will do a pre-purchase inspection of the RV you are interested in and give you a written report on the condition of the vehicle. Importantly, these inspectors should have access to moisture testing equipment that can more accurately detect evidence of water ingress.
MORE TIPS FOR FIRST-TIME PURCHASERS
● Don’t buy the first RV you see. Give yourself the opportunity to check out a few options. If the one you originally wanted has been sold, don’t be disheartened. With the market being so buoyant at the moment, another similar unit will become available in a short time.
● Don’t be afraid to bargain with the seller. No one selling anything secondhand will expect to sell at the advertised price. They will almost certainly leave themselves some wriggle room for negotiations. Take advantage of this. Just because it’s a seller’s market at the moment doesn’t mean you have to get ripped off. Negotiate in good faith.
● Ask for a weigh-bridge certificate. One of the biggest issues with secondhand RVs is that, over time, their owners will likely have made modifications to them. Many of these modifications will add weight to the vehicle. Asking for a weigh-bridge certificate will tell you the actual Tare weight of the unit. Compare this to the original Tare weight noted on the VIN plate or registration details to see how much actual cargo capacity you will have.
● Prepare a receipt of sale document. It is extremely important to ensure you legally protect yourself against any unforeseen dishonesty on behalf of the other party. A ‘bill of sale’ document outlines the terms of the sale, the responsibilities of both parties, as well as all the relevant personal information. Once signed by both parties, it serves as proof the sale took place.
● Prepare all the transfer paperwork. Take the time to visit the website of your state’s roads authority to see what is required to transfer the registration and ownership of the vehicle into your name. Download all these documents and have them filled out with your information prior to purchasing.
This means you are not reliant on the other party to do their part of the process. Being on the front foot will let the seller know that you are a serious buyer, and not just there to waste time.
This is, by no means, an exhaustive list of all the issues you should look out for when purchasing a secondhand RV but there is enough here to cover the majority of problems you will likely encounter. Our final piece of advice is to never assume you know everything. Talk to as many owners as you can, and never be forced into making a rushed decision. Think with your head, not your heart.


