

Before we jump into battery chargers and the types available, let’s start by explaining the kinds of batteries on the market. In the RV world, batteries generally fall into two categories. There’s the starter battery that’s used inside your tow vehicle to start the vehicle and supply power to your vehicle’s electrical system. Then, there are deep cycle batteries. When used in an RV, it is known as the ‘house. battery’, which could best be described as the battery used to run various 12V appliances inside the RV, as well the the lights and water pump.
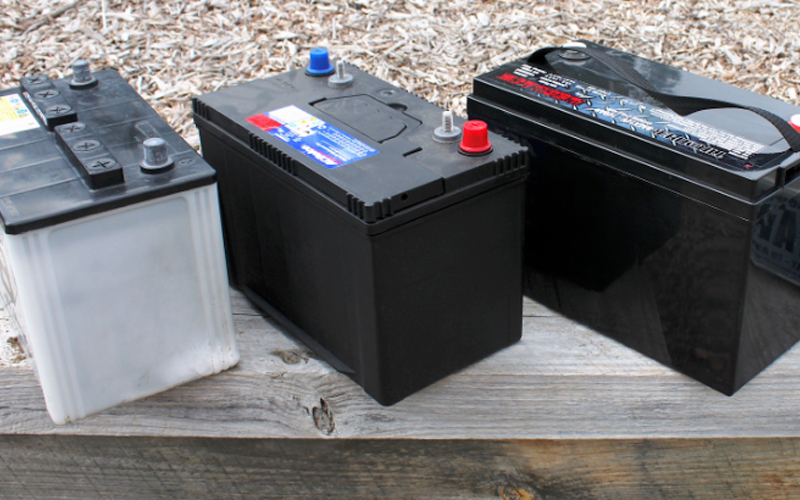
It can be a little confusing when RV house batteries and/or deep-cycle batteries come in many shapes, sizes, capacities and chemistries. Historically, the majority of the market has been made up of the lead-acid type. These include traditional flooded batteries as they’re a good entry level, affordable solution. But there’s also other styles, like calcium, maintenance-free AGM (absorbed glass mat), and gel.
However, technology is advancing at a greater rate, and today the use of various lithium chemistries is becoming a more popular and affordable proposition. Now that we’ve touched on the types of batteries, let’s look at how to go about charging them and keeping them in peak optimum condition.
CRANKING VS HOUSE BATTERY
First, there’s a difference between maintaining your cranking battery and your house battery. A well setup system should be able to recharge your batteries without relying on a 240V battery charger plugged into mains power.
For example, your vehicle’s car battery is designed to deliver a high current in short bursts and will recharge rapidly via your vehicle’s alternator. But you can’t solely rely on the same charging circuit to recharge your RV’s house batteries. So other charging methods are needed for house batteries, which we’ll cover next.
HOW BATTERIES CAN BE CHARGED
While there are multiple ways to keep RV batteries charged, not all methods deliver a perfectly full charge, but apply some form of current into a battery (known as amperage or amps for short). Here’s a look at some of the methods:
1) In-vehicle charging: the vehicle’s electrical system is the battery charger when your RV is connected to your vehicle via a dedicated Anderson-type connector, but this will typically only be a trickle charge and only effective if the voltage in the house battery is less than that of the vehicle’s electrical system. Modern cars now lower their alternator output when not needed in the vehicle and thus this will provide nothing to the house battery.
2) Solar panels coupled with a regulator: there are many different types and these can work differently, but essentially the sun is the charger via the solar panel setup.
3) DC to DC chargers: these use an input source such as solar or a vehicle alternator setup and they will will boost the voltage to a usable level and thus enable the battery to charge.
4) Generators: some have a 12V output that allows you to connect directly to a 12V battery. They are unlikely to charge more than 70 per cent as the generator will have a fixed voltage output, which is not high enough to charge a battery properly.
5) 240V mains battery chargers: there are multiple brands and types on the market. These range from small, basic portable units that connect using alligator clips, to a fully integrated battery management system (BMS). They all work differently.
Whether you choose a fixed system or a portable unit for multiple uses, it’s important to get the right type that suits your needs.
MAINS CHARGERS
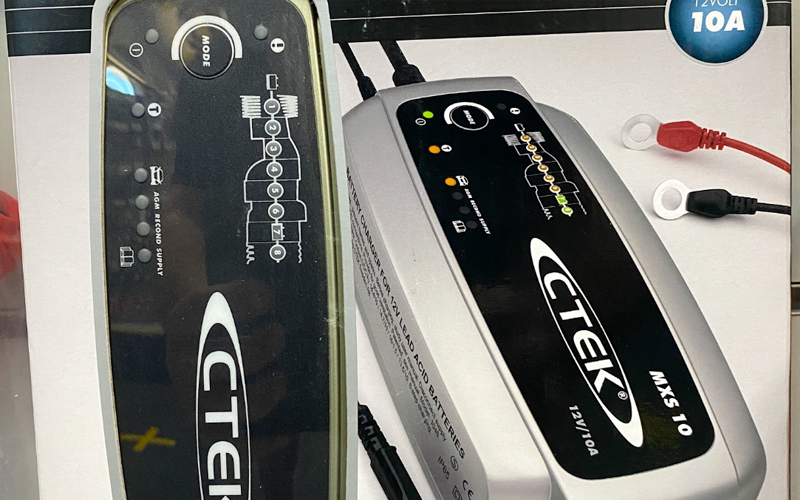
Whether you opt for a portable 240V charger or a fixed one, like a BMS, how it delivers charge to the battery will come down to how ‘intelligent’ the charger is. Nearly all battery chargers today are referred to as smart chargers. But what does this really mean? Depending on the brand and type, the word ‘smart charger’ will differ in each of these product offerings, which can get a little confusing.
Some will claim to be a ‘set and forget’ charger, where the charger can be left attached for extended periods of time. Some might also claim to be three stage chargers, while others might state nine stages of charging. So there’s lots to consider! Many modern chargers have sophisticated electronics and offer a variety of features and stages, but fundamentally it comes down to three: bulk, absorption and float.
• BULK
This is the first stage where the maximum amount of current (amps) is applied to the battery to increase its voltage.
• ABSORPTION
In the second stage, the voltage is brought to the maximum for that battery type. It can range from 14.4V for wet cell flooded batteries, to 14.7V for some AGM types. While voltage remains high, the amp rate is lowered. This has the effect of soaking all the cells in the battery and is critical to bringing it to a fully charged state.
• FLOAT
The battery is considered to be full in the third stage. The amps now applied to the battery are significantly reduced at around 1- 2A, while voltage is held constant at around 13.6V. This is perfect to keep the battery at maximum charge and ready to go.
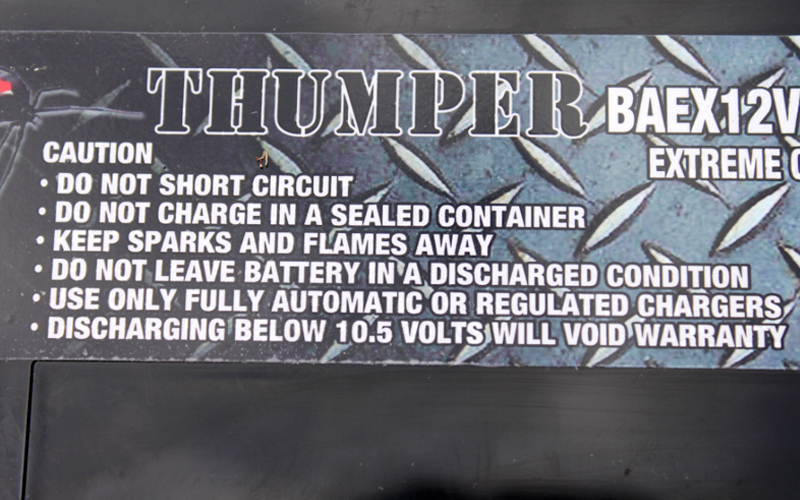
Note: For lithium batteries, it’s far better to use a charger that has a specific lithium profile. Special precautions and know-how is necessary to avoid any long term damage to the battery, as some smart lead-acid style chargers have other modes such as equalisation which will damage a lithium battery.

WHAT TO BUY
Whether you’re looking for a portable charging unit or a fixed solution that is secured permanently in the van, you’re ultimately looking for a charger that collects information from the battery and adjusts the charge, i.e., current and voltage (which is based on the information it gets from the battery). Regardless of whether you are after fixed or portable charging, consider what battery sizes/capacities you’re trying to charge (how many amp hours the battery can store).
It’s important to note that there’s manufacturer information on batteries that indicates the maximum current amp rating the battery can take on recharging. It’s pointless to get the biggest rated charger, say 50A, when the recommended maximum feed in current might only be 25A for that particular battery. So how do you know what size charger to buy? As a guide, take the amp-hour rating of the battery, i.e., its capacity in amp hours, and divide that number by the charger’s amps rating. Then add a small percentage, say 10 per cent, to allow for a total topup of the battery.
For example, if a 100Ah battery went totally flat and you were to use a 10Ah charger, it would take 11 hours to recharge the dead battery to be 100 per cent fully charged. A quality charger usually comes with small lights or a blinking light that pulsates at different interval frequency rates to indicate which stage of charge it’s in at any given time. They also may come with a diagram of a battery and the light bar to indicate its state of charge.
They display volts, state of charge, level of battery capacity remaining, and how long until the battery is fully charged. While we’ve only touched on BMS here, we could easily fill an entire article on this solution alone, as they take battery management and charging to another level.
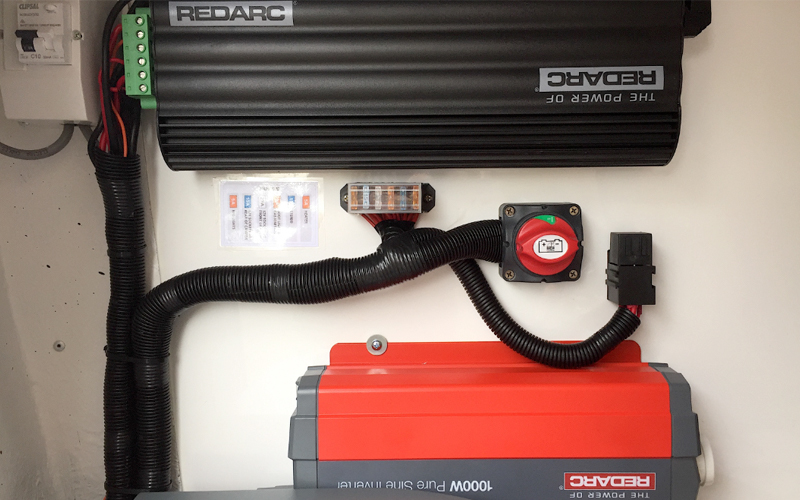

A QUICK WORD ON FIXED BATTERY CHARGERS
For an RV solution which incorporates a fixed-mounted 240V charging solution, a fully integrated battery management solution (BMS) is the way to go. They typically have more smarts than a standard charger. They display volts, state of charge, level of battery capacity remaining, and how long until the battery is fully charged. While we’ve only touched on BMS here, we could easily fill an entire article on this solution alone, as they take battery management and charging to another level.
SUMMING UP
Whether it’s the electrical system in your tow vehicle or your RV, there’s going to come a time when the batteries may need some supplementary additional charging to bring them back to 100 per cent.
Provided you understand the type of batteries you’re charging, along with their size and capacity, you’re going to be in the prime position to know how to select an appropriate 240V charger to meet your needs. Having this knowledge can make a world of difference to having trouble-free electrics or needing deep pockets to buy a new battery every year.


