

Starlink’s satellite-based internet service has revolutionised connectivity for people across the country, particularly for the travelling community. That said, it does have a glaring problem. It needs 240V mains power to operate. However, you can convert it to run off your RV’s 12V system.
In this article, we look at why you might do that, the equipment you will need, how to install it and, most importantly, if it is worth the cost.
My wife and I have been travelling full-time for almost six years. It’s fair to say that living in your caravan has its challenges and, for us, one of those was having a reliable internet connection. We had spent a small fortune on modems and data plans with our chosen telco; however, we were never satisfied with the service. It was slow most of the time and there were great swathes of the country in which internet reception was non-existent. It was frustrating, to say the least.
Then, in July last year, we bit the bullet and purchased Starlink, the Space X satellite internet service. Without a word of exaggeration, it changed our lives. We could finally get fast, reliable, unlimited internet access anywhere in the country for the same monthly cost as our previous mobile broadband service.
That said, one issue with Starlink was a constant frustration. The hardware is reliant on 240V mains power. What’s more, peculiarities in the hardware cabling meant we had to run the system outside, which wasn’t good for security or if the weather turned nasty. If I ran the router inside the van, I had to run the cable to the dish through an open window. Again, not ideal. I wanted to find a way to simplify the setup to negate these issues and a 12V conversion appeared to be the way to go.
CAN’T YOU JUST USE A SMALL INVERTER?
The answer to that is yes but it doesn’t solve any of the problems we encountered. We still had to keep the router outside or run the cable through a window. Plus, there was an efficiency issue to consider.
The Starlink system uses 56V DC to power the dish. It does this using a protocol called Power Over Ethernet (POE). When you use the Starlink router powered from 240V, it converts the power to suit the dish. There are efficiencies in this process and you can tell that by the heat generated by the router. Put simply, it gets hot. That may not be a huge problem if you’re at a caravan park plugged into 240V mains power but, if you’re free-camping, that energy loss is eating into your batteries.
But there’s more. To power the Starlink system off the grid using the standard router, you’ll need to run it from an inverter and that means there’s more energy loss through the voltage conversion process. You’re converting the voltage three times. 12V to 240V to 56V. It would be much more efficient to only have to convert the voltage once and that’s where a 12V conversion kit can help.
WHAT HARDWARE DO I NEED?
For this 12V conversion, you will need several components:
- A 12-volt router;
- A 12-volt to 56-volt POI converter;
- A Starlink to RJ-45 cable converter;
- Some ancillary hardware; and
- A good 12V source.
Now, you could scour the internet for each individual component and build the system up yourself, or you could purchase a ready-made conversion kit. We went with the latter, getting our gear from Cowfish Technologies. These guys are experts in caravan and RV internet communications. We’ve been running the Cowfish 12V 4G wi-fi router, VanConnect, for the last two years and it’s been fantastic.
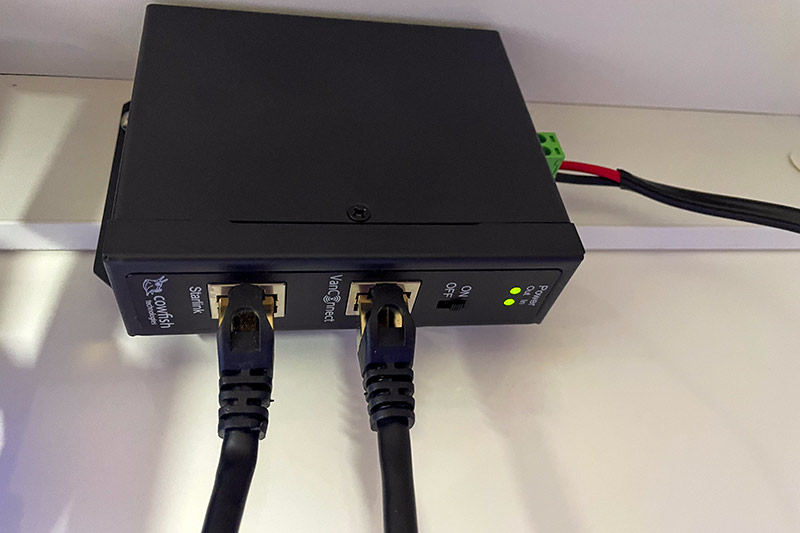
As far as 12V Starlink conversion kits go, Cowfish has two options: With a weatherproof wall connection that requires the Starlink cable to be modified; or with a non-weatherproof connection that does not require cable modification.
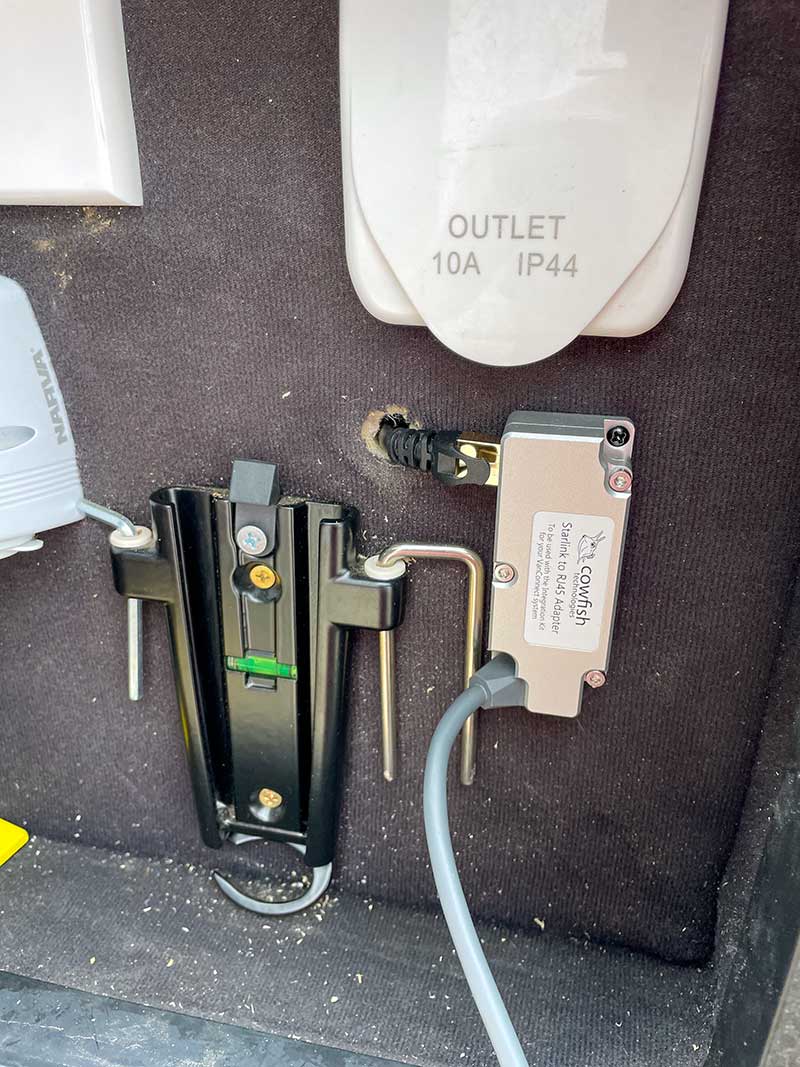
We went with the second option as we have an outdoor TV/media box under the awning that was suitable for this connection and my wife wasn’t keen on me drilling holes into the side of our van.
The kits come with everything you will need to convert your Starlink system to run off 12V, remembering you will need a 12V router or, at least, a portable wi-fi hot spot with a WAN connection.
INSTALLATION PROCESS
Installation is very simple for anyone handy with 12V electronics; however, you do need to put a lot of thought into planning where the cables will be routed. If you were building a new caravan, this would be a simple process but, in an existing van, this can be challenging. I was fortunate to be able to run the cabling behind our kitchen cabinetry and up through a wardrobe where I had an existing 12V outlet.
The non-weatherproof option we used is the easiest of the two to install and, if you don’t necessarily need a full weatherproof cable connection, this would be my recommendation for the DIYer. If you need or want the external weatherproof connection, you will need to cut the Starlink dish cable and install two RJ45 plugs. This requires a proper RJ45 crimping tool. It’s not impossible to do but it adds an extra level of complexity and a potential point of failure.
For me, the most daunting aspect of this second option was the prospect of drilling a hole in the wall of the van to install the weatherproof wall plug. Again, it’s not rocket science but if you stuff it up, you could end up permanently damaging your caravan. If you’re not confident, I would recommend having the installation completed by an experienced caravan repairer.
A WORD ABOUT THE 12V POWER SOURCE
The Starlink system uses quite a bit of power, somewhere in the range of 50-60W, peaking at over 100W when the dish alignment motors are running. At 12V, that equates to around 5-10A of current draw. The power supply wiring to the system needs to be able to support that with minimal voltage drop.
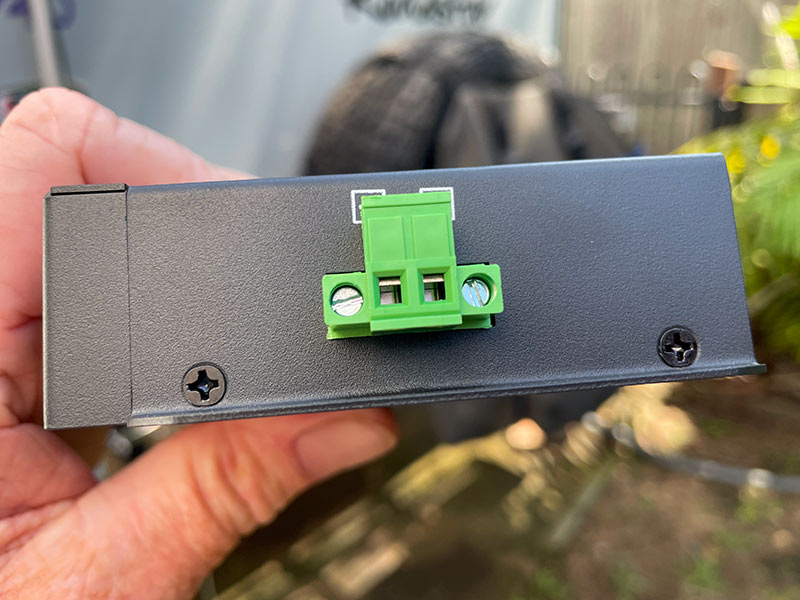
If you have any 12V power outlets (cigarette lighter), the wiring to these may be adequate; however, if they are on a power line that feeds other accessories, you might find the cabling inadequate. It would be best in these circumstances to consider installing a dedicated power feed for the Starlink system. Cowfish Technologies recommends a minimum of 14 AWG cable, correctly fused and installed by a certified auto electrician.
SAVING POWER

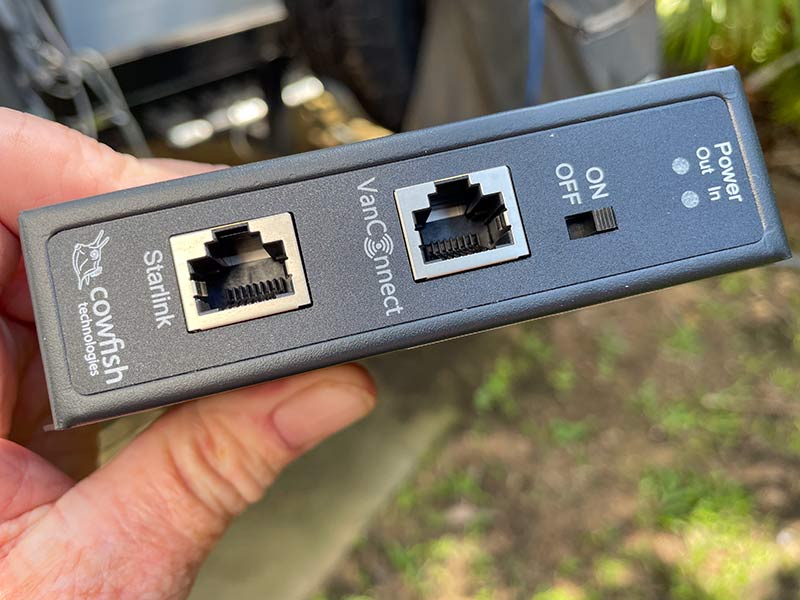
The Cowfish converter has an integrated power switch. This is important as, in order to conserve battery power, you may want to turn off your Starlink system while you’re not using it. I installed a separate switch that controlled the power to both the wi-fi router and the converter, so I could turn both off at the same time. This is not a requirement for the Cowfish kit. I just wanted this level of convenience.
CONNECTING THE SYSTEM
Once the installation is completed, it’s time to connect the components. Thanks to the simplicity of the Cowfish system, this is very simple and almost impossible to get wrong. Regardless of which option you choose, you will end up with a connection to the dish, a patch cable between the dish power supply and the router, and power connections to both. That’s pretty much it.
The Cowfish internet wi-fi routers are pre-configured to recognise the WAN connection to the Starlink system and prioritise this over the mobile broadband connection. You then connect all your devices to the new wi-fi network and you’re up and running.
SYSTEM MANAGEMENT
With the original Starlink system, you did all your system management through the Starlink app. Now that you’re using a separate router, the management of this will be through a separate system. This will be very familiar if you’ve ever installed and used a wi-fi router at home on the NBN network.
You open an internet browser on your chosen device and log in using the 192.168.1.1 network address. This will get you into the Cowfish router administration system where you can customise various aspects of the network, including network name and passwords.
This may seem a bit daunting at first but don’t worry, Cowfish Technologies provides simple step-by-step instructions that are very clear and easy to follow. If you still have issues, Cowfish has excellent customer support.
Every other function of the Starlink system, including checking connection statistics, obstructions, speed tests, dish settings and support is still accomplished using the Starlink app.
STARLINK PERFORMANCE
The first thing I noticed and appreciated was the 12V conversion makes the set-up process much simpler. We only have one cable connection to make each time we set-up at a new location.
We don’t have to worry about connecting the Starlink router. In every other aspect, the system works exactly as it did with the original hardware, with some additional functionality. This is due to the features of the Cowfish router. It can use a mobile data connection with its own SIM card, which means you have a back-up network connection should the Starlink system be unusable or you’re stopping overnight and don’t need Starlink.
The Cowfish router is also pre-configured as a media server. You just connect a hard drive and stream any saved media to any connected device. Again, all the set-up instructions are included and are very simple to follow.
The other change you will notice is a greatly increased wi-fi signal range. The Cowfish router trounces the original Starlink router for wi-fi range.
As far as power consumption is concerned, I have observed a slight reduction of around 1-2A compared to running the system through an inverter. This may not sound like a lot but, when you’re free-camping for extended periods, even 1A per hour can make a difference to your power management.
HOW MUCH DOES IT COST?
The Cowfish Starlink Integration kit sells for $299. That compares very favourably with purchasing all the individual components to replicate the functionality of the Cowfish product.
If you don’t have a 12V wi-fi router, Cowfish Technologies off three options:
1. VanConnect Zero – wi-fi router only: $249;
2. VanConnect 4G – wi-fi router with 4G modem: $599; and
3. VanConnect 5G – wi-fi router with 5G modem: $1199.
Cowfish Technologies also offers a variety of external antenna options for its 4G and 5G routers.
A FINAL WORD
I understand there will be some readers thinking that this appears to be a lot of work for a small power gain but, to me, a 12V conversion of the Starlink system offers so much more. The simplified set-up is a huge bonus, especially if you’re on the move and changing locations regularly.
Having the modem mounted internally means you don’t have to worry about the weather affecting the original router. You get simplified power management when camping off-grid, especially over extended periods. But best of all, you will have a connectivity solution in your caravan that rivals anything you could have at home.
The Cowfish router combined with the 12V converter gives us full internet high-speed connectivity virtually anywhere in the country, backed up by a failover to mobile broadband.
The superior wi-fi network gives us greater customisation with a media server all-in-one integrated solution powered by our caravan’s 12V electrical system. Having been able to install this myself made it a very satisfying project.
More information: www.cowfish.com.au


Thanks Marty, you’re a legend.