
It was not that long ago when we’d hitch up our caravan and camper’s electrics using a simple seven-pin plug to control the lights at the rear. It’s also quite likely that one of those seven pins might have been used as a charge wire to supply 12V and low amps to an on-board house battery.
Fast forward eight or 10 years and RVs today can have much larger battery banks to run a host of 12V appliances. These battery banks need recharging, requiring high current to do that job. The humble seven-pin plug isn’t going to cut it. In fact, they’re more likely to melt over time due to excessive current draw.
It’s common practice these days to make the connection between a vehicle’s electrics and those of a caravan or camper via an Anderson plug. This style of plug can also be used to connect solar panels or run a range of accessories in and around vehicles and RVs. While they might look complicated, adding an Anderson plug for an extension lead or other 12V power inlet/outlet isn’t difficult.
Let’s look at Anderson plugs in a bit more detail and then show you how to wire one up.
ANDERSON PLUGS EXPLAINED
Just like many things these days, you can get an original Anderson plug as well as cheaper copies. You’ll find the genuine ones are labelled ‘Anderson Power Products’, and measure 48×36.5×15.9mm.
These plugs are commonly found in grey plastic and come with fully insulated housing. They’re also made from durable polycarbonate and rated up to 50A. Each plug has two stainless steel spring locking clips inserted into the fitting.
Wiring is connected to two low-resistance silver-plated contacts, which are capable of handling high currents with minimal loss before being assembled into the plug.
The imitation knock-offs are cheaper to buy, but they come with their own issues. It’s important to note some won’t always mate correctly into the genuine product. This could cause you problems as caravan and camper manufacturers use the genuine type. At best you could expect these to join together, but you might find the electrical connection isn’t so great.
ANDERSON PLUG TYPES AND SIZES
Our preference is to use a 50A Anderson plug that has a two-piece connection. This entails two Anderson plugs being joined together to complete the connection. There are positive (+) and negative (–) symbols embossed on the moulded plastic, and the plug’s design prevents incorrectly joining them together.
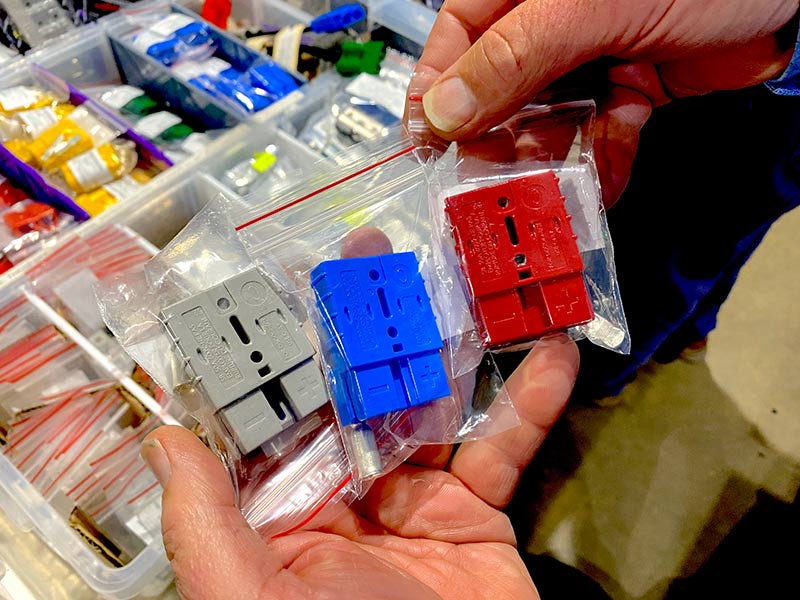
Anderson plugs come in a range of colours, with each colour being a unique mould to prevent incorrect connection. For example, it’s not possible to connect a red Anderson to a grey Anderson. Both plug connections need to be the same colour to create a unique circuit, i.e., red-red, blue-blue.
The use of different colours means they can be used for different applications. As an example, you could use red Anderson plugs for any unregulated solar panel connections, or blue Anderson plugs as constant power supply to ASC control circuits on your caravan. You’ve got the flexibility to use the different colours for your own applications.
In this article, we’re going to put together the commonly used 50A Anderson plug that can use anywhere from 16 to 6 American Wire Gauge (AWG) cable. You may come across larger Anderson plugs that are used when much higher current connections are required.
ANDERSON PLUG ACCESSORIES
There’s a range of accessories available to assist in a quality job and finish. You could say there’s a solution for almost every situation, including mounting brackets, waterproof covers, dust shields and T handles.
Prices will vary for a packet of authentic Anderson plugs, so it pays to shop around. We bought a four-pack for $25 for the job featured in this article.
Besides having Anderson plug kits, many suppliers stock a variety of pre-made leads. You’ll find things like basic extension leads to ones fitted with alligator clips, plus battery terminal eyelets and even double adapter leads.
SUMMING UP
With a bit of know-how, making your own leads with Anderson plug connections to suit your circuits and accessories isn’t difficult. However, you should always seek professional assistance if in doubt.
However, not only is it rewarding that you’re able to do it yourself, but you can make them to your exact requirements. And you never know, one day you may need to repair or add a new Anderson plug while you’re out on the road. Once you’ve successfully installed your own Anderson plug, you’ll know exactly what to do if the need should ever arise.
FABRICATING STEPS
How we fitted our own 50A Anderson plug…
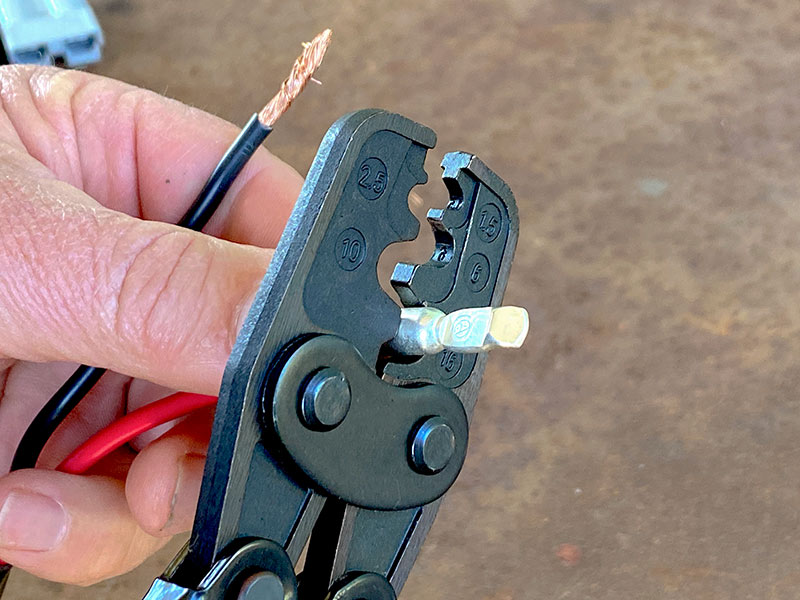
1. Strip the cable to expose the strand of wires.
2. Insert the strand of wire into the contact terminals.
3. You could either crimp the terminal closed or use the flood solder technique. We would recommend finishing this connection with some heat shrink.
4. Check which wire goes into the positive and negative sides before inserting them into the Anderson plug.
5. Push the correct cable-attached contact into the back of the Anderson plug until you hear a ‘click’ sound from the stainless steel spring clips inside the plug. Lightly pull back on the cables – you shouldn’t be able to remove the contact or cable from the now-assembled Anderson plug.
6. Use a multi-meter to double check connectivity (if necessary and depending on the application).
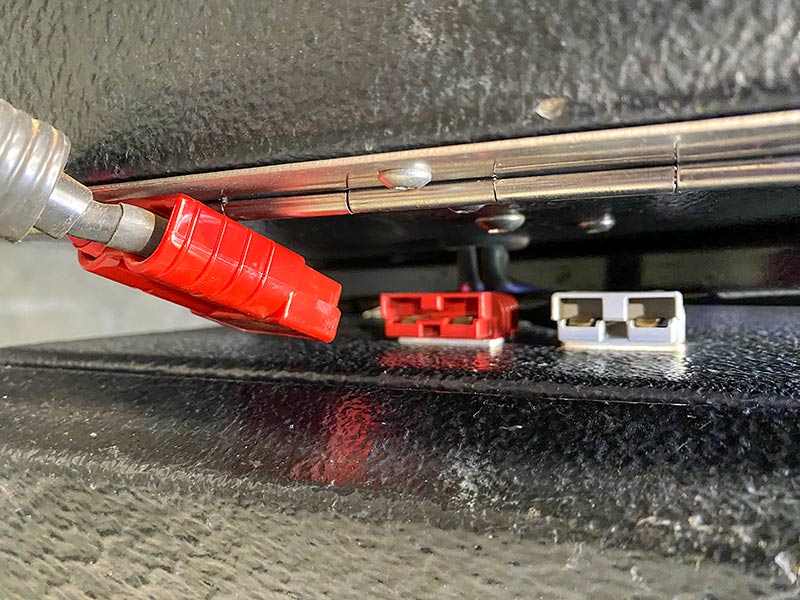
7. Check the installation by mating your newly assembled Anderson plug with an already assembled plug.
8. All that’s left to do now is to enjoy your newly completed 12V circuit!
Note: Watch the video within this article for a more detailed explanation of this process.


