
Since joining the Starlink Mini bandwagon, we’ve only used our unit on 240V when staying in caravan parks or with a small inverter. As great as that’s been for being connected, it’s become a pain to pass the cable through a window or out the door to have Starlink Mini up and running.
Wanting a more user-friendly solution that would put an end to that scenario, we looked at the Cosmo Mini Premium kit offered by Cowfish Technologies. It’s a DIY-style job that allows Starlink Mini to be powered using our 12V caravan house batteries, so that was right up our alley for a caravan project.
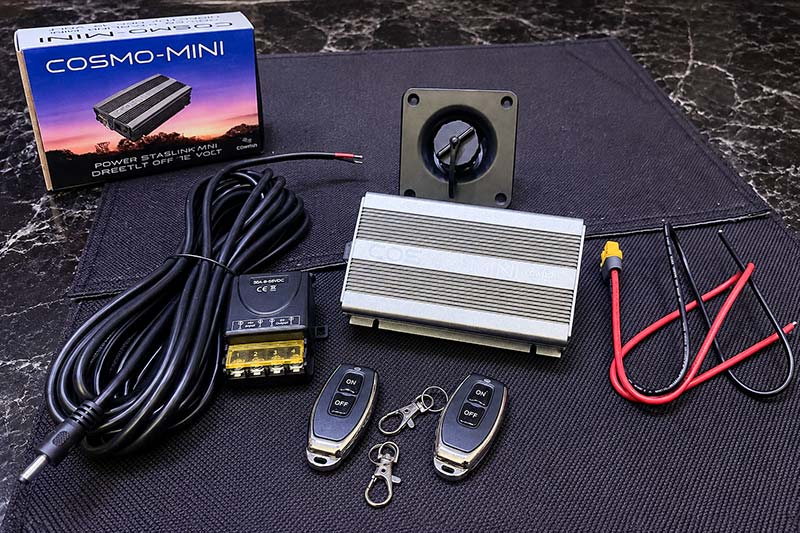
We didn’t stop there either. The Cowfish website showed that it offered a relay and two remote-controlled switches to work alongside the Cosmo Mini kit, so we jumped on that as well. Let’s get into the project.
WHAT’S IN THE BOX
The Cosmo Mini Premium kit comes with the necessary components for the install, with the Cosmo Mini being the main component. This unit replaces the standard Starlink Mini power supply, and steps up the 12V caravan batteries to the voltage that the system requires to avoid voltage drop.
The Premium kit also comes with plug-and-play connecting solutions, with both an Anderson plug and a 12V cig-style plug included. There’s also a weatherproof cable connector and 6m of power cable provided. The remote-controlled switch we added comes separately to the Cosmo Mini Premium kit, but it is also available from Cowfish Technologies.
THE PROJECT
For this DIY install, we’ll be wiring the unit directly to our caravan’s fuse block via the remote-controlled switch for a more permanent solution. To do this, we won’t need much of the kit’s 6m cable and will cut this to length when positioning the unit. This will then plug directly into the Cosmo Mini, and the other end will be wired directly to where we choose to place the weatherproof cable connector.
Step 1
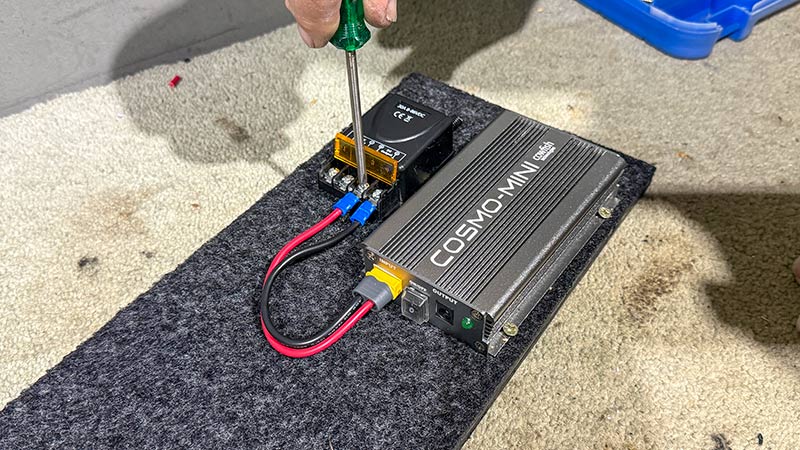
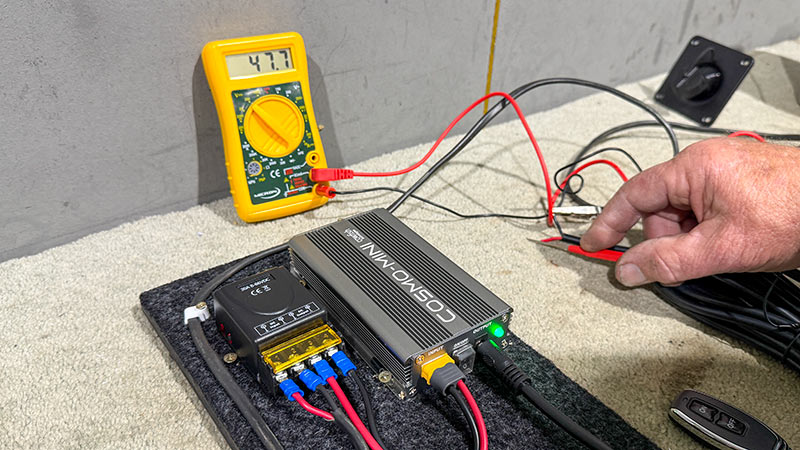
Mounting solution: After choosing an install location, it was off to the workbench to make a small mounting board so that everything could be connected and wired-up easily. The Cosmo Mini and the remote-controlled switch were mounted side by side. A length of power cable was added, which we later routed and connected to the caravan’s fuse block. It was then a quick bench test to ensure the connections and units were all working correctly.
Step 2
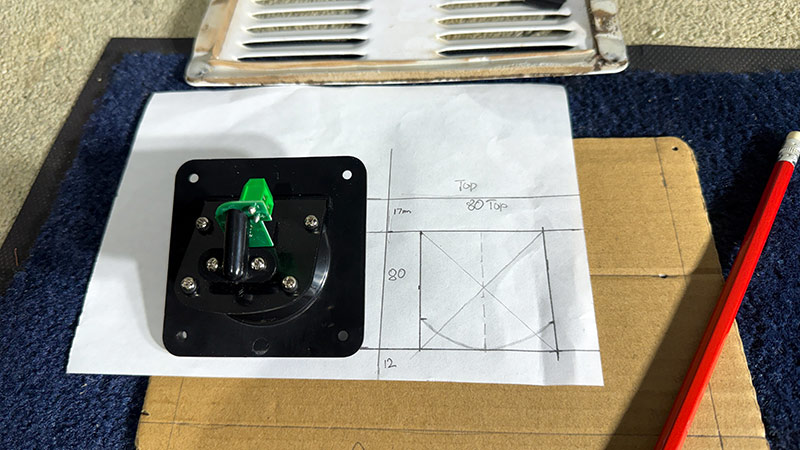
Cutting the weatherproof cable connector hole: Caravan with ribbed aluminium cladding, like ours, won’t have a nice, flat surface to mount the connector. We therefore utilised the externally-mounted vent that’s designed for our caravan house batteries. We felt it’s large enough to still supply venting if we were to cut a hole in it and mount the cable connector to one side. The vent was removed and the cut-out completed using a cardboard template we had made earlier.
Step 3
Mounting the weatherproof cable connector: This connector was mounted to the vent using some flexible sealer to make a waterproof connection. We also added our own homemade backing plate for added strength, and sandwiched the cable connector between the vent and the plate. Everything was secured using four stainless steel bolts.
Step 4
Cable length: We worked out how much power cable was needed and cut it to length before refitting the modified vent to the van. The power wires were stripped and tinned with solder before being connected to the cable connector. Note: it’s important to wire it up according to the diagram to have the correct polarity before proceeding to the next step.
Step 5
Re-fitting the vent: The next job was to put the vent panel back on the caravan. The cable was fed through the vent opening and screwed in place using the existing screws and gaskets. A small bead of silicone was then reapplied to the edges to finish the job.
Step 6
Fitting the mounting board: The mounting board was placed in position inside the caravan to connect the wiring from the cable connector to the Cosmo Mini power outlet. Some electrical terminals were then added to the unit’s power supply cable before being connected to the caravan’s fuse board. The last job was to screw the mounting board down so nothing moved using some saddles and cable ties.
Step 7
Test time: With the install complete, it was time to test things out using a multi-meter and a length of Starlink cable that was connected to the weatherproof cable connector. The reading jumped to 47.8V within seconds of being switched on, so we knew we had voltage at that point if we were to connect the dish outside.
HOW IT WENT
As far as DIY installs go, this one is relatively easy – the kit comes with all required components. You’ll only need to supply a few minor things like screws, nuts and bolts, plus a couple of cable ties and saddles for the wiring. That said, this will all come down to how you choose to mount the Cosmo Mini unit.
Some flexible sealer may also be needed to make the weatherproof cable connector watertight. Again, this will depend on where you choose to locate it and the type of surface you’re mounting it on.
THE VERDICT
Using Starlink Mini is simple enough, but no longer needing to rely on a 240V power solution or passing power cables through windows or leaving doors ajar, is an absolute winner thanks to this kit’s weatherproof cable connector.
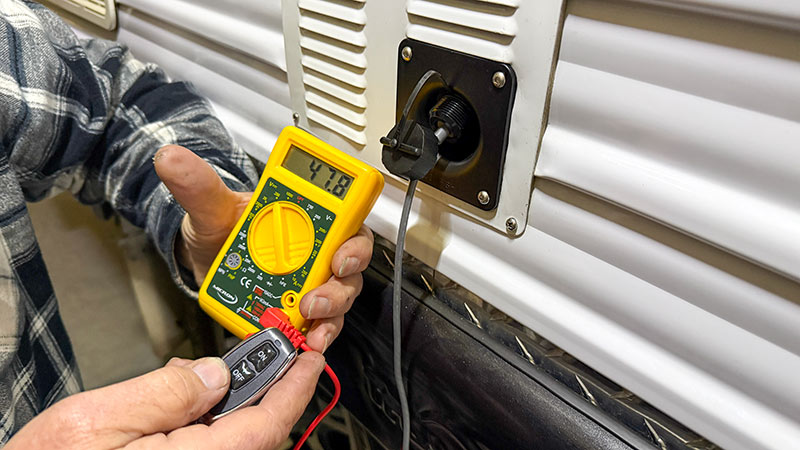
We’ve now got a seamless solution that only needs the Starlink dish set-up outside and the cable connected to the weatherproof cable connector. Being able to switch it on and off using the remote controlled switch, well, now we’re talking!
In our books, being connected to the outside world couldn’t be any easier. With less than a day’s work in the shed, we’ve now got a quick and convenient way to use Starlink Mini, and we can turn it on and off from wherever we are in the caravan…even while we’re in bed!